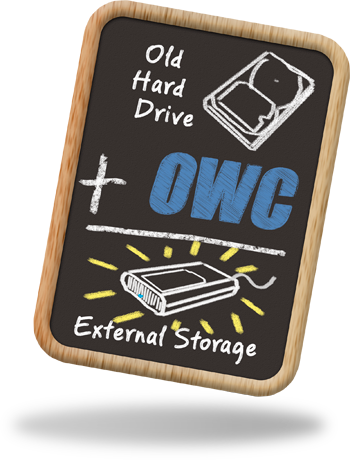
Don't lose the storage you already have... Use an old hard drive for handy external storage. Survival of the Fittest. It’s an unfortunate truth with computers - as computers evolve, so do the requirements for the software that runs on them. Many popular pieces of software now require an Intel-based Mac; with OSX 10.6 Snow Leopard on the way, a large portion of the Mac community is looking at being “left behind” with the next upgrade. If you’ve got an older machine, you will eventually want (or possibly even need) to upgrade to a newer model. In a slightly less pleasant situation, what if your MacBook or MacBook Pro took a tumble off the table, out of your book bag or down your stairs, and now the screen is cracked and/or the whole thing doesn't work? AppleCare is not likely to cover this, so now you’re stuck with a rather expensive paperweight. You’ll need a new Mac. Either way, once you have come to the conclusion you need a new Mac, the question becomes what to do with your old one. If the computer no longer does what you need it to, donating it to a charity or school may seem like a good idea. However, if it isn’t working well for you, it likely won’t be of any use to the charity or school either - these institutions often require current, working technology, not the outdated or broken equipment they likely already have. At this point, if it’s functioning, you can either repurpose the computer for a single task (web terminal, a music server, etc.) or you can part out the machine for enthusiasts of that particular model (and, yes, just like automobiles, there are fans of just about every Mac model out there) and recycle that which you cannot sell or give away. But with those two choices, the question comes up - what do you do with the hard drive(s) inside? If you’re repurposing the machine, then you really only need one hard drive to hold the singular software. Anything extra is overkill. If you’re parting out the machine, you don’t want to just give the drive(s) away. Even a 40GB drive is still 40GB of useful storage. So, rather than give away a perfectly good drive, or letting it languish unused in a computer that doesn’t really need it or (worse yet) in a drawer or on a shelf somewhere, why not put it into an external case? |
||||
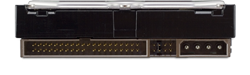
Decisions, Decisions. Of course, if you’re going to put your old drive in an external case, you want to be sure that you’re getting the right case for the job. Fortunately, OWC has a case for whatever drive you’ve got. For Mac Desktops (except the mini)
For Mac Laptops and the Mac mini
Once you get the enclosure you need, all you have to do is install the drive in the case according to the included instructions, and plug it in. The drive should show up right on the desktop. |
||||
Now what? This is actually the fun part. You now have an external drive which you can use in a variety of ways.
The choice is up to you! |
 Got a computer that's dead, damaged or just too old to do what you need it to?