Five Archive Strategies to Help Your Data Survive
There are a few primary ways to approach archive for the video professional which can range from cost effective to very expensive. As always the standard production pyramid of cheap, fast, and good (pick two) is the best way to break down and approach an archive strategy.
Strategy #1:
Sneakernet Archive
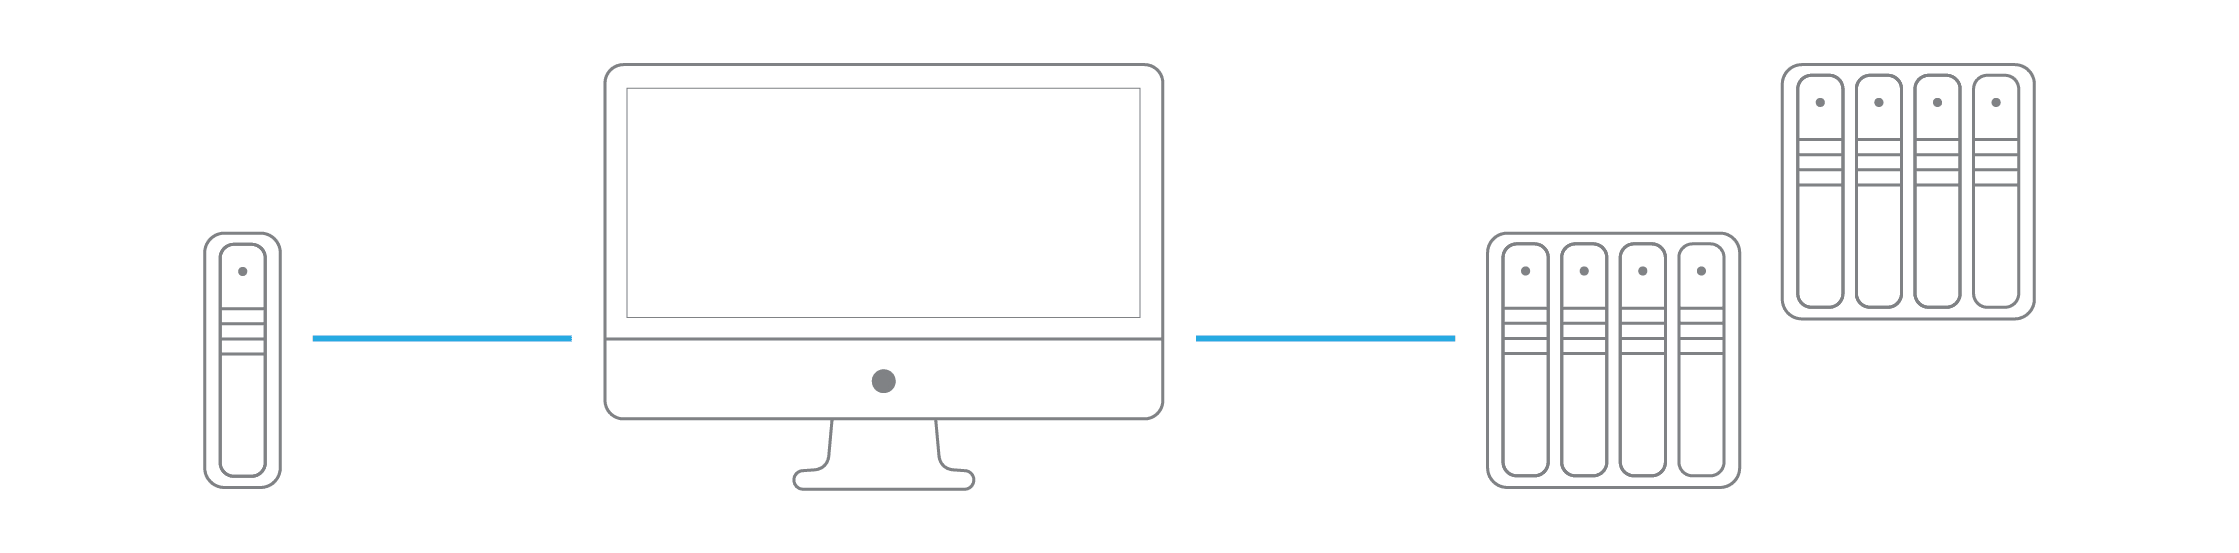
Sneakernet Archive is the most common because it is easy and generally cost-effective. Basically, for any large project (or group of projects), you buy either two identically sized drives (or if you have a budget, one high performance and another that’s slower for backup), and you name them the same thing. By naming them the same way and making sure you have the same directory structure, regardless of which drive you have connected, you should not have to reconnect your NLE’s project file to your media, which can become annoying have to keep doing it. Most DIY editors, independent filmmakers, and hobbyists subscribe to this strategy, which is very effective. It’s as simple as, if one drive fails, plug in the other and keep going. Just make sure your project files are backed up to another drive/in an autosave vault.
Pros
Simple and cost effective with no software to learn.
Cons
It can be a very manual process, and hard drives are not a great long term archiving tool (5+ years) as they all fail eventually over time, especially the cheap ones.
Recommended primary drive
Strategy #2:
Sneakernet + LTO/Blu-ray
This method is identical to the strategy above, but you know that you need something that’s more built to last from an archive perspective. In this scenario, prevalent in corporate video departments, you would have your backup drive(s) all be the same, and often those drives would be drives that are in use by other editors and might be high performance as well. As in, everyone is using the same cloned drive, but they’re all high performance like the Thunderbay 8. Meanwhile, you know that you need those video assets preserved no matter what, so you periodically use LTO tapes to back up to, typically, at the end of a large project. Once you’ve copied those to LTO, those tapes either go in a vault or a mutually approved by your boss’s off-site storage location. Frequently, insurance/bondholders require this for large productions/operations as part of an agreement.
Pros
More redundancy and typically allows you to pass any insurance/bond certification for your company/project
Cons
Another layer of manual redundancy that can be prone to failure.
Recommended primary drive
Strategy #3:
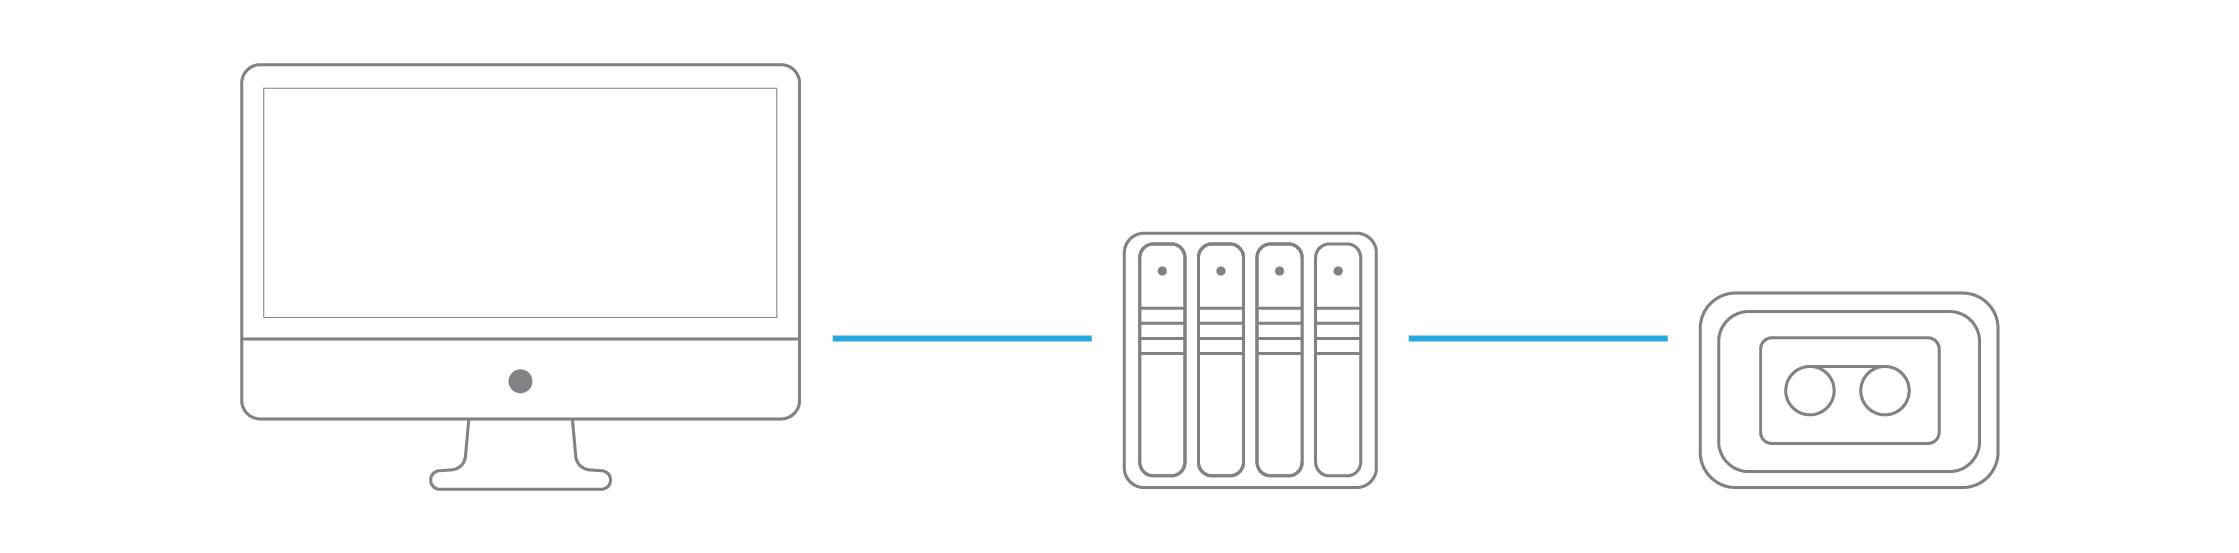
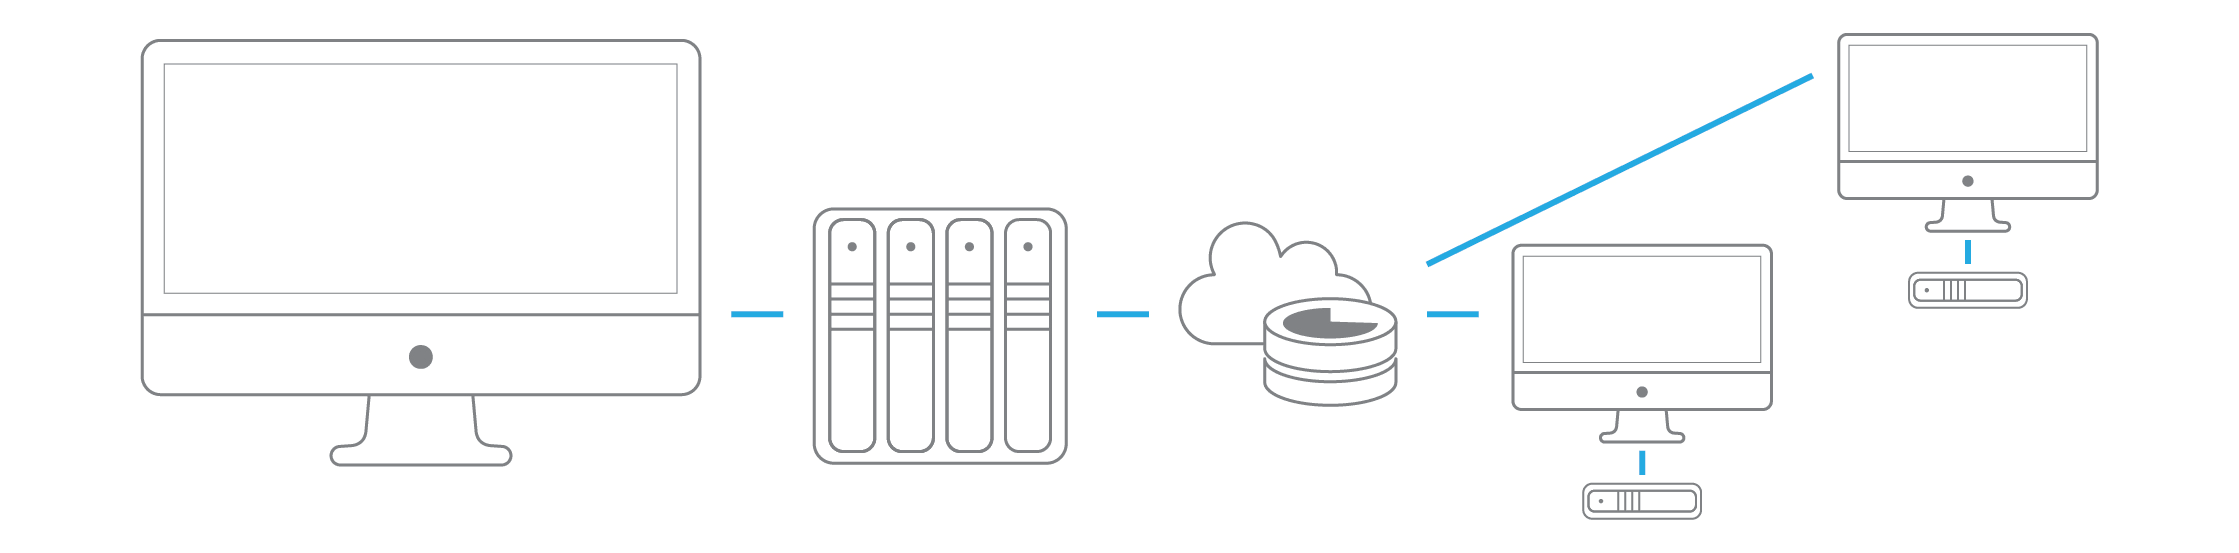
Video server + sneakernet + LTO
Once your video department gets large enough, you get tired of continually copying all of the media to all of your different editors, and you want a centralized place for everyone to work from. So you buy a video server (for instance, the OWC Jupiter). When that happens, you typically repurpose all of the sneakernet drives you had been using to become backup drives for your video server if there’s a networking issue on a client machine, or something happens to the server as you are about to hit a deadline. Since you’ve already bought these drives, this can be a great way of getting more life out of them. Typically, you’d also be backing up to LTO for offsite copy purposes, which would give a rock-solid nearline/offline backup strategy.
Pros
This is a really clean workflow for a video team.
Cons
Can be a lot of manual backup and managing of video assets.
Recommended primary drive
Strategy #4:
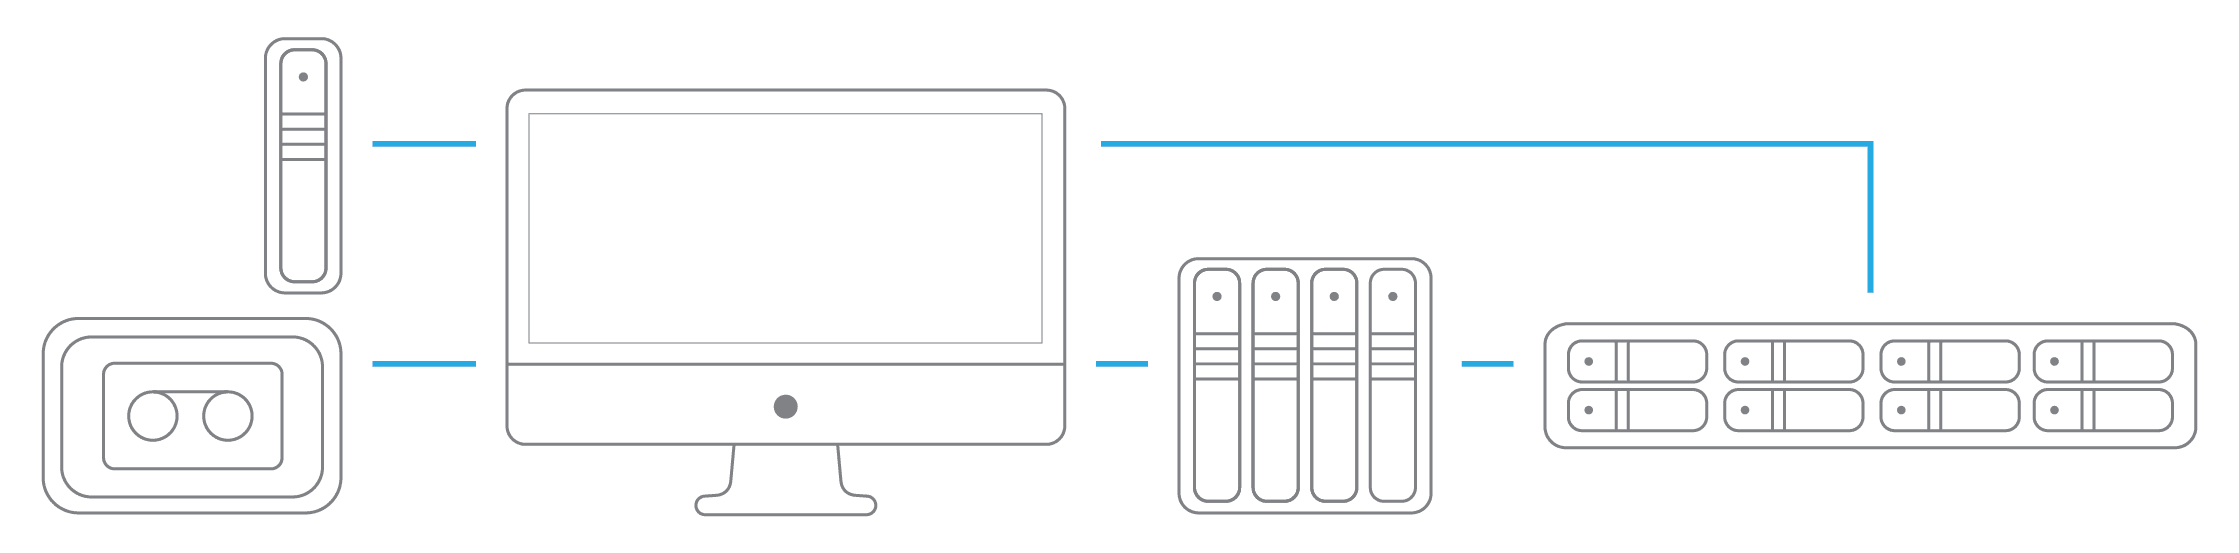
Video server + Sneakernet + LTO + Backup software
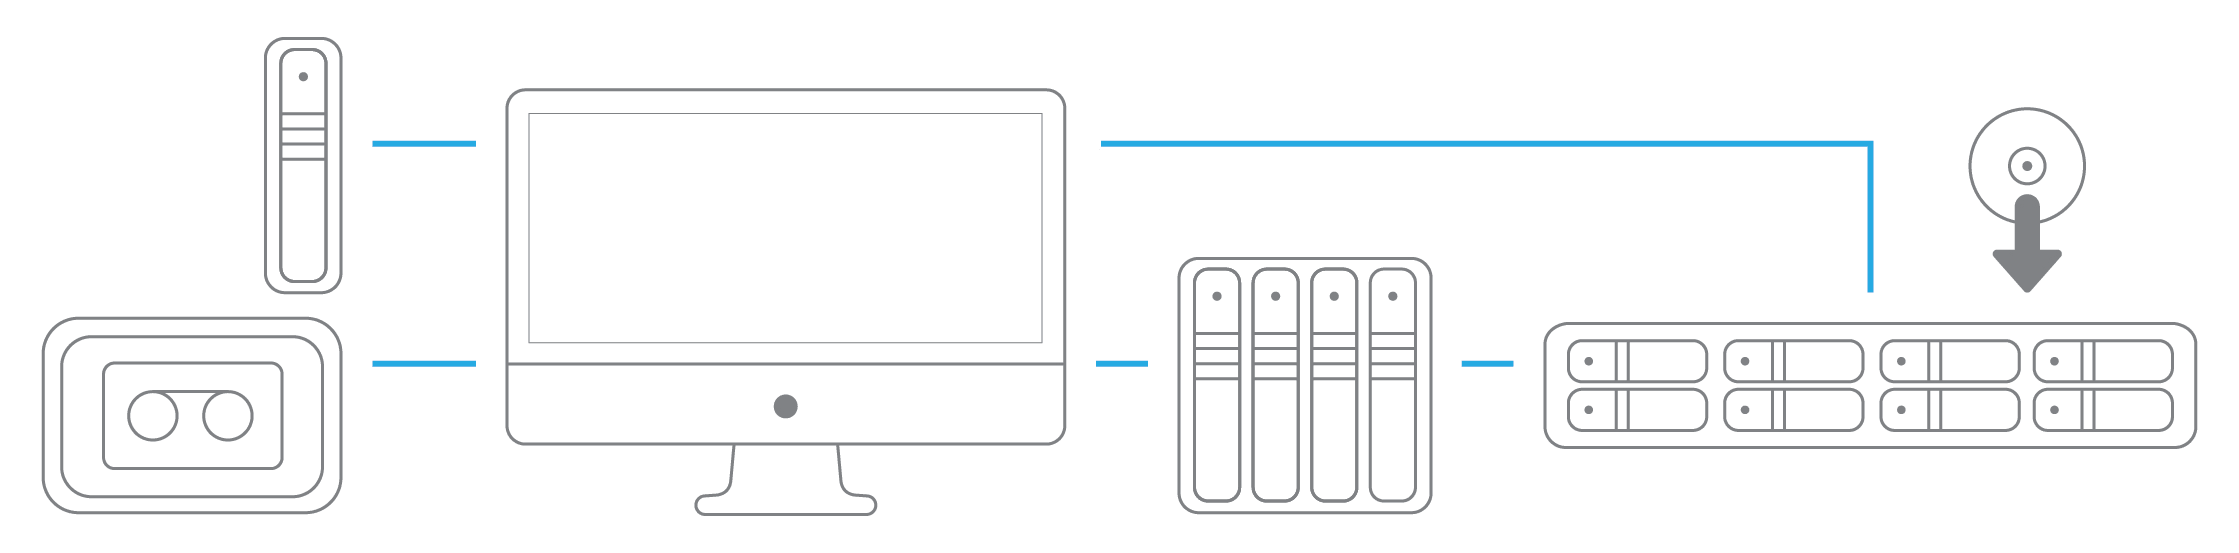
Basically, this is the same as above, except you have a backup software like Archiware managing the whole process for you that automatically checks your backup devices at defined intervals, and automatically moves your data for you, making sure everything is properly backed up and in sync. This is a massive timesaver. Also, with some shared storage systems, you can use snapshots, which are essentially like Apple’s Time machine but for a giant video server, and it only backs up the data that had been missing from the previously backup, which means that it doesn’t go through the whole process of a giant lengthy backup when you have a ton of media.
Pros
The fastest/smartest way to work for a video team.
Cons
This can cost more money.
Recommended primary drive
- OWC Jupiter
Strategy #5:
Put your cloud storage on a local external drive for remote workflows
You can easily stay in sync with other editors by either sharing folders from you video server with them, or sending them a drive that they can use, have them label it the same as what you’re using, and then put a Dropbox/Google Drive folder on it, and if you’ve named the drive identically, you can now largely stay in sync with your collaborator(s) around the globe. This is especially useful for managing things like new VFX renders, etc. where an artist will just save over a previous render with a new version and this will automatically update within your edit as soon as the cloud update has happened. Also, depending on how much media there is, you can come up with a folder system where you move your media out of the cloud drive once it’s copied over into another folder, and this will help you save on cloud storage fees, which can be high. Either way, it’s a great system for remote collaborators to archive media for each other no matter where they are in the world.
Pros
The fastest/smartest way to work for a video team.
Cons
This can cost more money.